Choosing the harness over collar is a decision made by many responsible dog owners .It better protects a dog’s delicate neck and offers more stable control. However, even the most well designed harness can cause discomfort or pose a risk of escape if worn incorrectly.
Whether you’re a first timer or looking to improve your routine, this step-by-step guide will provide clear and straightforward instructions.
We’ve simplified the process by focusing on two of the most common harness styles, along with a final checklist to ensure safety and comfort. Let’s get started.
Step 1: Quick Identification — What Type of Harness Do You Have?
Before you begin please take 10 seconds to identify the style. This will make the rest of the process smoother.
Overhead / Standard Harness
Features: Typically has a larger head loop that needs to be slipped over the dog’s head first. The leash D-ring is located at the center of the back.

Step-In Harness
Features: Shaped like two connected leg loops. It is laid flat on the ground for the dog to “step into” with its front legs. The buckle usually fastens on the back.
Now, please skip directly to the corresponding section.
Step 2: Step-by-Step Guide
A. How to Put on an Overhead/Standard Harness

Ideal situation: Your dog is calmly sitting or standing, with you positioned beside and slightly behind them.
Preparation and Positioning: Unbuckle all fasteners and straighten out the harness. Use hand signals or verbal commands to keep your dog calm and in position.
Slip Over the Head: Gently slip the larger head loop over your dog’s head, similar to putting on a sweater. Ensure the D-ring is centered on its back and not tilted to one side.
Guide the Front Legs Through: Locate the two leg loops on the chest. Lift your dog’s left front leg and then the right front leg, placing each into the corresponding loop. If the harness has a full side-buckle design you can first slip it over the head, then let your dog step into one side before wrapping the other side around.
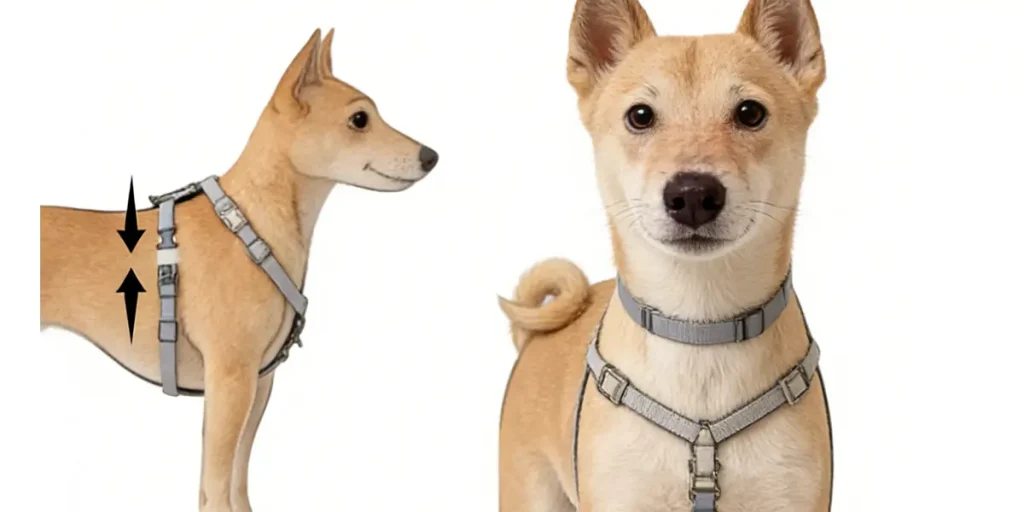
Buckle and Adjust: Fasten the strap beneath your dog’s abdomen by connecting the buckle. Listen for a click to confirm it’s securely locked.
Initial Adjustment:Now tighten each adjustment strap until the harness feels snug but not too tight. Detailed guidelines for proper fit will be explained in the checklist later.
B. How to Put on a Step-In Harness
Ideal situation: On a flat surface with your dog standing in front of you.
Lay It Flat: Fully unfold the harness and lay it flat on the ground, with the two triangular leg loops facing upward and the back buckle positioned on top.
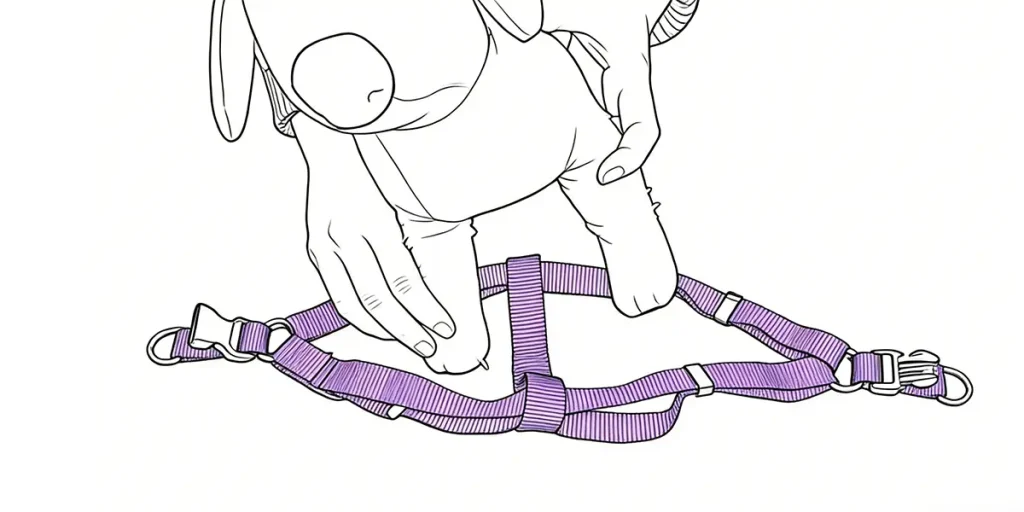
Guide the Paws In: This is the core step. Use a treat or hand signal to guide your dog to place its left front paw and right front paw into the corresponding loops. If your dog doesn’t understand, you can stand behind it and gently lift each front paw into place.
Lift and Buckle: Hold both sides of the harness near the buckle and lift it evenly until it rests against your dog’s chest and abdomen. Then fasten the straps together over your dog’s back.
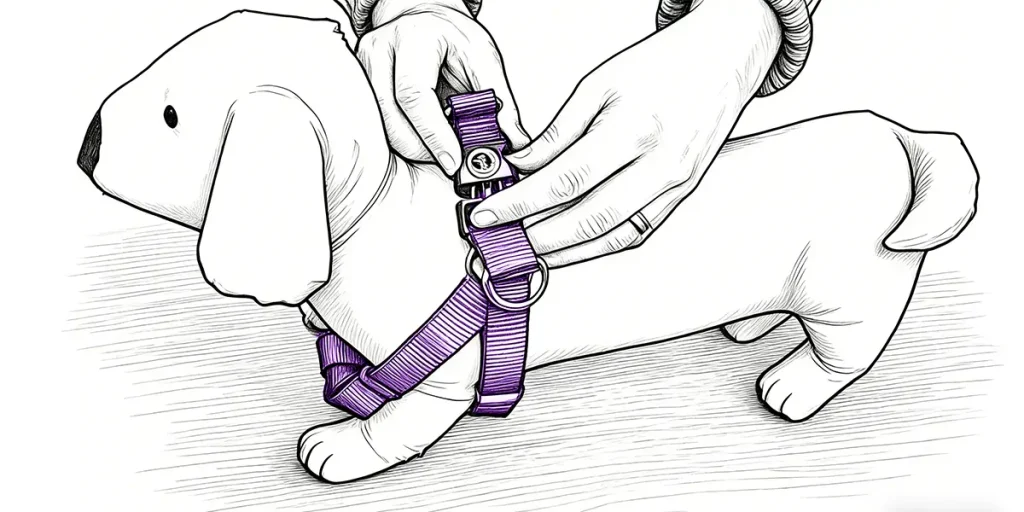
Adjust and Check:Similarly, adjust the tightness of all straps. Finally, perform a simple test: give a gentle pull forward on the D-ring and observe if the harness slides backward or risks slipping over the dog’s head. If properly worn, it should stay securely in place.
Step 3: The Ultimate Post-Fitting Checklist (Important !)
Regardless of the harness type, spend one minute completing the following checks after putting it on. This is the gold standard for ensuring safety and comfort.
Snugness Test: The Two-Finger Rule
Slide two fingers flat together between any strap and your dog’s body. You should be able to move your fingers freely but feel slight resistance. If three or more fingers fit easily, it’s too loose. If one finger is difficult to slide in, it’s too tight.

Position Check: Clear of Sensitive Areas
Throat: All straps must lie below the neck and must not press against or rub the trachea.
Shoulder Joints: The chest strap should cross the front of the breastbone, not rest on or interfere with the shoulder joints, which could restrict your dog’s natural stride.
Armpits: Check that the leg loop straps are not too tight, to avoid chafing the sensitive skin in the armpit area.
Security Check: Prevention of Escape
- Gently shift the harness from side to side with your hand. It may allow slight movement but should not significantly slide to one side.
- Once more, try gently pulling up and forward on the back D-ring. The harness should not be pulled over the dog’s head.
Comfort Observation: Your Dog’s Feedback
Give your dog some space to move around freely. Observe the following:
- Does it walk or trot smoothly and naturally?
- Does it try to chew at or rub against the harness especially on the back or under the armpits .
- Does it appear relaxed? Signs like frequent body shaking or a stiff posture may indicate discomfort.
Step 4: Patient Training Methods for Dogs Who “Resist Wearing the Harness
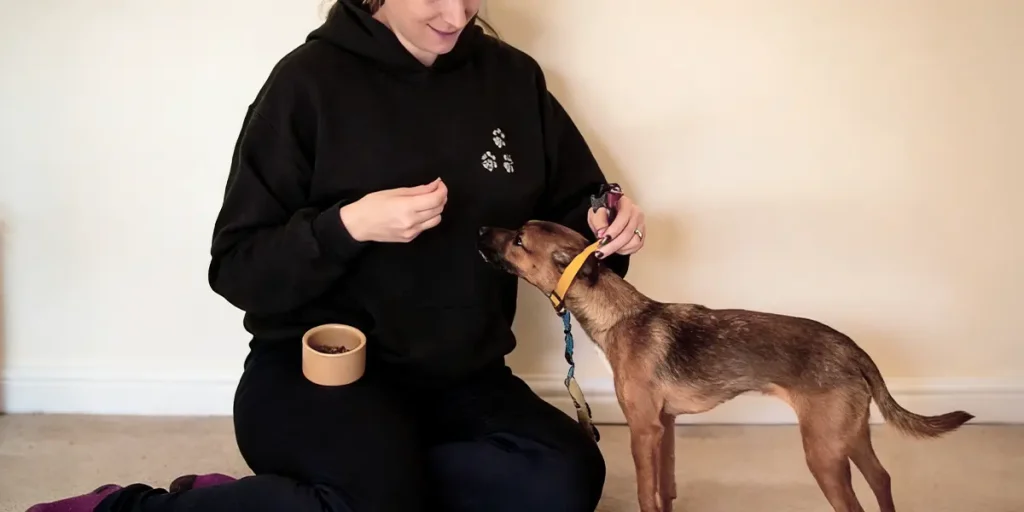
Start with Look and Sniff : Place the harness on the ground. Each time your dog sniffs it curiously, immediately reward them with a treat and praise.
Break down the steps and reward progressively: First attempt to slip the harness just slightly over the head → Reward. Successfully slip it fully over the head → Generous reward + playtime. Guide one paw through → Reward.
Key: In early training, immediately follow putting on the harness with your dog’s favorite activity like going for a walk or playing fetch . So the harness becomes a signal for fun time.
Keep patience and avoid force: The entire process should be relaxed and positive. If your dog resists strongly today, simply stop and try again another time. Forcing them will only deepen their negative association.
Properly fitting a harness for your dog is the cornerstone of every safe and enjoyable outdoor adventure. The first few attempts might feel a little clumsy, but if you and your furry friend remain patient and follow these clear steps and checkpoints, you’ll soon be working together seamlessly.
The right method requires reliable tools. As a professional harness manufacturer with over 10 years of industry experience, Lucky Mfg has provided safe and comfortable pet gear solutions for more than 1,000 brands worldwide.
We believe that combining professional manufacturing with proper use is the key to ensuring peace of mind on every outing.

Hi, my name is Lina Zhang, I am the author of this article, and also the Founder of Lucky MFG, with 15 years of experience in the pet product industry. If you have any questions, you can contact me at any time.